
How do you transfer an image on to the wood? I see this question all the time, by those new(er) to wood burning. It's a great question, but some times the answers given are well, just not. When we go to start a new piece, we are chomping at the bit to start burning. This is totally natural, burning is the fun part! Although transferring our image is really just as important as prepping the wood & burning. It should take a little bit of time. Here’s all of the information you can know & more. 😉
Methods I do not recommend!
There is a technique and couple of products that I really want to caution you about. I'm seeing these recommended more and more in burning groups and in videos. First, I see a lot more people recommending the heat transfer method. Quick overview, this is the process of printing from a laserjet or inkjet printer onto a surface that keeps the ink wet. The ink is then applied by low heat or by scraping over the back of the surface onto the wood. For pyrography, this is highly not recommended for a couple of reasons.
Why?
1. Laserjet printer toner is plastic base. “Toner dust is derived from specialized plastic particles that adhere to the paper and are melted into place by heat and pressure.” ¹ (more information linked below)
2. Inkjet printer ink is made of multiple ingredients including: “Resins, such as alkyds, ketones, acrylics, and formaldehydes, are also used in printing to create surfaces that are glossy, or heat, water, and chemical resistant. You will usually find multiple resins in any given ink.” ² (link below)
There is much more to the ingredients of both laser & inkjet ink, but I only wanted to list a few to illustrate the toxicity issues of using this method. Back in 2017, I contacted multiple printer companies asking about the safety of burning over the ink. Unfortunately, I only heard back from one company, Canon. I appreciate that they took the time to really discuss amongst themselves and got back to me. Here is the email exchange. (Click to enlarge)
As you can see, Canon does not recommend the heat transfer method when burning over the ink lines will occur. If you are just looking to transfer a photo onto wood without burning, then go for it.
There is another reason besides the toxicity issues… you can’t erase the lines! The inks stain the wood because wood is porous. For laser ink, it melts the ink into the wood when you transfer. Simple sanding is not going to remove these lines, especially since the ink is made to be as durable as possible.

Pyro Paper (left) & Stick-N-Burn (right)
Pyro Paper and Stick N Burn
There are two products on the market that I do not recommend using with wood burning. We will start with the first, Pyro Paper. Back in 2011, I purchased a 50 sheet pack of translucent Pyro Paper. It claims you can draw or print out your pattern, tape it to your wood, and burn through it. Technically this is correct. BUT what is not mentioned is what this paper is coated with or any kind of safety information.
So when I received my order, I followed the instructions, printing out my owl pattern. I taped it to my board and began burning. Immediately I started smelling some kind of chemical. Not only was there a nasty smell, you can’t see what your burning looks like. I couldn’t make it 10 minutes burning my lines through the paper. I stopped and ripped it off of my board. I then had to transfer with graphite paper, once I could get a new print out lined up.

Test done on birch with the Optima 12S skew.
I pulled out this same pack and 10 years later gave it another shot. I wanted to see what the lowest heat setting was that I could use… the answer is 3, barely. Also, just for this small test with heat settings 3, 4, and 5; I went over a few lines of a raven printed out. With just these 5 strokes using my Optima 12s skew, I got this nasty build up on my tip and the chemical burning smell. It required the wax cleaning method & 2 separate strop cleaning sessions to remove the gunk. If you are wondering about the cleaning methods, click here.

On the left, the Pyro Paper with a printed pattern. Right, the black at the end of my tip is the gunk I mentioned. It was a clean tip when I started the test.
Honestly, if you are trying to burn realistically, you definitely do not want to use this method. Outlines, especially outlines using higher heat takes away from your burning. You can do wonderful realistic shading, but if you have the outlines from using this paper, it will look off. Not to mention that if you printed on this paper, you are dealing with the chemicals from this paper and chemicals from the inks.
Stick N Burn
Now on to the Stick N Burn, which is mostly used for gourds. The Stick N Burn has two additional issues to the Pyro Paper. It is a plastic type film and has an adhesive completely covering the back. I received some Stick N Burn back in 2016 when I was sent two boxes of gourd products to try out. I was hesitant to try out the Stick N Burn because of the adhesive and because of how the film felt. I was right to have these concerns. I went ahead with trying it out and it wasn’t a good experience.

Photos are showing the thick smoke coming off the tips. The tip has to burn through the plastic type film before hitting the gourd. You can watch the full video for this, here.
This stuff smokes and stinks to high heaven. Luckily, I had my studio door & window open along with have a fan to draw the smoke away from my face. I had to remain out of my studio for no less 24 hours to air it out. It smelt like burnt plastic. My tips were heavily caked with plastic gunk, ink, and gourd carbon. Even though the company sent me multiple packs of Stick N Burn, I have never burned over another pattern. In fact, when I went to add more design to the gourd that I was doing, I printed out and used graphite transfer paper to draw that design on. There was no way I was going to burn over that film again.
The biggest thing I want to stress is, I can NOT find any MSDS (safety data sheets) or manufacturer’s information for either products. Over the past 3+ years, I have spent a couple hours each year searching for this information. There is zero information other than “buy it from us” links. The seller's pages I looked at all had the the same copy & paste info for both products. There is a phone number on the front of the Pyro Paper (new name & number compared to my pack) and I have called it twice; both times the number is a busy signal. They also have an etsy page that I may have to contact through in the future. There is zero branding on the Stick N Burn, so no one to contact. I will update this section if I get any additional information in the future.
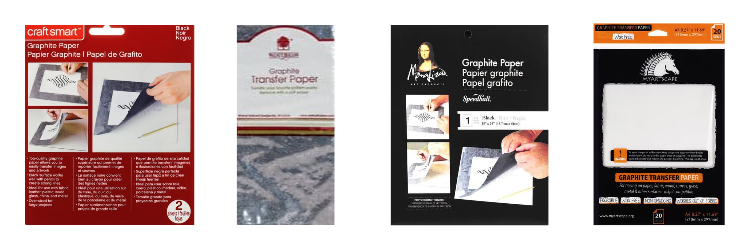
Carbon paper v Graphite paper
Not all graphite transfer paper is actually graphite, it's carbon transfer paper labeled as graphite paper. I know this may sound confusing, but it's all about labels. Several years ago I called Speedball about their Mona Lisa graphite paper. I had used it for a project and noticed I couldn’t get it off of my basswood. I could lighten it with sanding, but not full remove it. I was transferred to their product tech department and got some very interesting information.

The Mona Lisa graphite paper isn’t graphite, it's carbon with wax. The gentleman I spoke with said companies use the term “graphite" similarly to how some people say they need a “Xerox” when they mean copy. He said he had approached the higher ups a couple of times in the past to take graphite off of the label as this was misleading, but it didn’t happen. He then told me they don’t make their carbon paper they buy and then sell it with their proprietary label. I asked about other brands like Michael’s & Hobby Lobby. He said it was the same stuff with their own proprietary label. One company in the US is the distributor for this particular carbon paper made in China. What does this mean? These are all the same carbon paper with proprietary labels for individual companies and none of them are graphite. I followed up asking if the chaco paper they sell has wax and he said yes. Dang it!
Why does this matter?
Carbon paper is made with a combination of wax and petroleum products. When heat comes into contact with the transfer lines, the wax & petroleum products melt into the grain. This is why you cannot fully remove it. For burnings like dark lettering you may not care about the erasing part. But you do however have to worry about the smoke coming off of the tip. For realistic burnings and light shading the carbon will show through. If you pay attention you will notice that those areas of the burning will look muddy (dirty) and a slightly different color.
Transfer methods I recommend
We do have some safe options for transferring our pattern. Of course there is the draw directly on the wood with a 2H or H pencil, but most people don’t feel comfortable with this and you can dirty up the board with a bunch of erasing. My favorite method (if you can have one) is wax free graphite transfer paper. There are a couple of brands on the market. Make sure it says wax free either on the package or in the product description. Or you can make your own graphite paper with a 4B or higher pencil and a piece of printer paper… this takes several layers of graphite. Or you can use this same method of rubbing graphite on the back of the print out directly. Lastly, a projector with a short throw (16:1) can be used to project your image as you draw over the lines.

For me, I use the wax free Walnut Hollow white label graphite transfer paper. It comes in a 12” x 24" sheet that I cut down to a smaller piece (about 4” x 6”). Even on a big board I do not use the entire sheet, as this is a waste. I start on the left side of my pattern and transfer all of the lines in the area of the cut graphite paper. I then pick it up and move it to the next section. This keeps my board clean as my hand is never sitting on the transfer paper and I can reuse this square for multiple 8” x 10” or large pieces.

The graphite paper on the right is folded in half. This is how I store it.
When using the Walnut Hollow transfer paper, I do recommend going at it with a lighter pressure, especially on basswood. If you press to hard it can be tricky to remove. I love my vanish 4-in-1 eraser and it does a great job most times. Every now and again I have had to use some 400 grit sandpaper and a small amount of denatured alcohol on a paper towel to finish removing the graphite.
There are a couple of other wax free graphite transfer paper like Saral. For me this does make a mess when handling or transferring. It does erase well, so it is an option. The myartscape wax free graphite paper is another option. It behaves exactly like chaco paper and I did contact the company in May of 2020 as I had questions. I received one email in response but they did not follow up with any other emails as they stated they would. With this graphite paper I found I had to push down much harder to transfer which I don’t care to do. I don’t want indentations where I have transferred. The graphite did remove pretty well.
Now that we gone over the good, bad, and ugly of transferring; we are going to finish up with why you should take your time hand transferring. There is an extremely good reason to hand transfer and that is muscle memory. If you are transferring directly from a photo, you will have drawn your subject twice by the time you have finished your burn. This is a great way to learn proportions and allows you to start noticing details better. All of this helps you to improve your wood burning skills quicker. Your brain better understands a line that you have already drawn. Additionally, this trains your brain to see what is there, not what it believes should be there. Doing a hand transfer also allows you to better pick and choose the lines you need to transfer & allows you to make changes without already having altered the wood.
For me, by the time I have finished a burning, I will have drawn my subject three times. I don’t care to draw directly from a photo print out, so I draw my pattern first in Photoshop and then print out on tracing paper. I can better line up my pattern with the wood & use less pressure to transfer my lines. It is much easier to catch mistakes before they happen compared to fixing them afterwards.
Most of the people who recommend the heat transfer method or Pyro Paper, haven’t done the research. Granted with the Pyro Paper there isn’t any research to get a hold of. Although all you have to do is use it once to smell an issue. Some people make videos about the heat transfer method, not having a clue about the toxicity issues or just not caring. They are looking for your views and that’s all. Some may mean well, but safety is important. They don’t have to deal with you possibly getting sick as some have when creating toxic smoke.
Wood smoke is a carcinogen, so the more we can lower any additional smoke or fumes the better. This will allow us more time burning into the future. I have seen people say they burn in another room, therefore it doesn’t affect others. Well this isn’t exactly true. If someone can smell it, it can affect them… it can also affect your pets! Number 1 safety rule of burning: NEVER ever burn over any kind of color media, varnish, or plastic! The only “color" safe to burn around is the General’s white charcoal pencil. It doesn’t contain wax or a harmful pigment.
I know transferring by hand can be tedious, time consuming, and well plain old boring. I totally get it. The more you transfer by hand the quicker you will get. Plus you can always listen to your favorite book or music. That definitely helps it to move along faster. A detailed pattern ranging from 8” x 10” to 12” x 16” can take me between on average 20 to 45 minutes to transfer. In the scheme of burning, this is really quick. It is well worth spending that little extra time to have a safer burning experience. Happy Burning! 🔥
The first two links below are so you can read further about laser & inkjet ink ingredients. Any product links are only for products I recommend. I will never link to a product I don’t like or is unsafe just to make a buck.
¹ laserjet printer toner: https://cash4toners.com/info/2018/11/28/what-is-toner-made-of/
² inkjet printer ink: https://www.1ink.com/blog/what-standard-printer-ink-is-made-of-1inkcom/
Amazon links:
Walnut Hollow wax free graphite transfer paper: https://amzn.to/38umvaG
Saral artist graphite transfer paper: https://amzn.to/38wPv1Q
Vanish 4-in-1 eraser: https://amzn.to/2JYJC3M
Faber Castell drawing pencils: https://amzn.to/3bo7JEi
General’s White Charcoal pencil: https://amzn.to/35ryuUH
Strathmore tracing paper: https://amzn.to/35qFeC2
*this link is for the 9” x 12” pad. I do have to cut off ½ “ off of one edge to fit it in my printer paper tray.
Denatured alcohol: https://amzn.to/39gvc7
*this is the brand I use. I keep it in a canning jar for easier access. It should last a while as you are not soaking the wood with it. Allow your wood to fully dry before you resume burning.